

Install
- Navigate to the No code Center section from the left navigation bar in Togai
- Click on
Appsto access the list of apps with tight integration support - Locate and select
Quickbooksfrom the available apps - Click on the
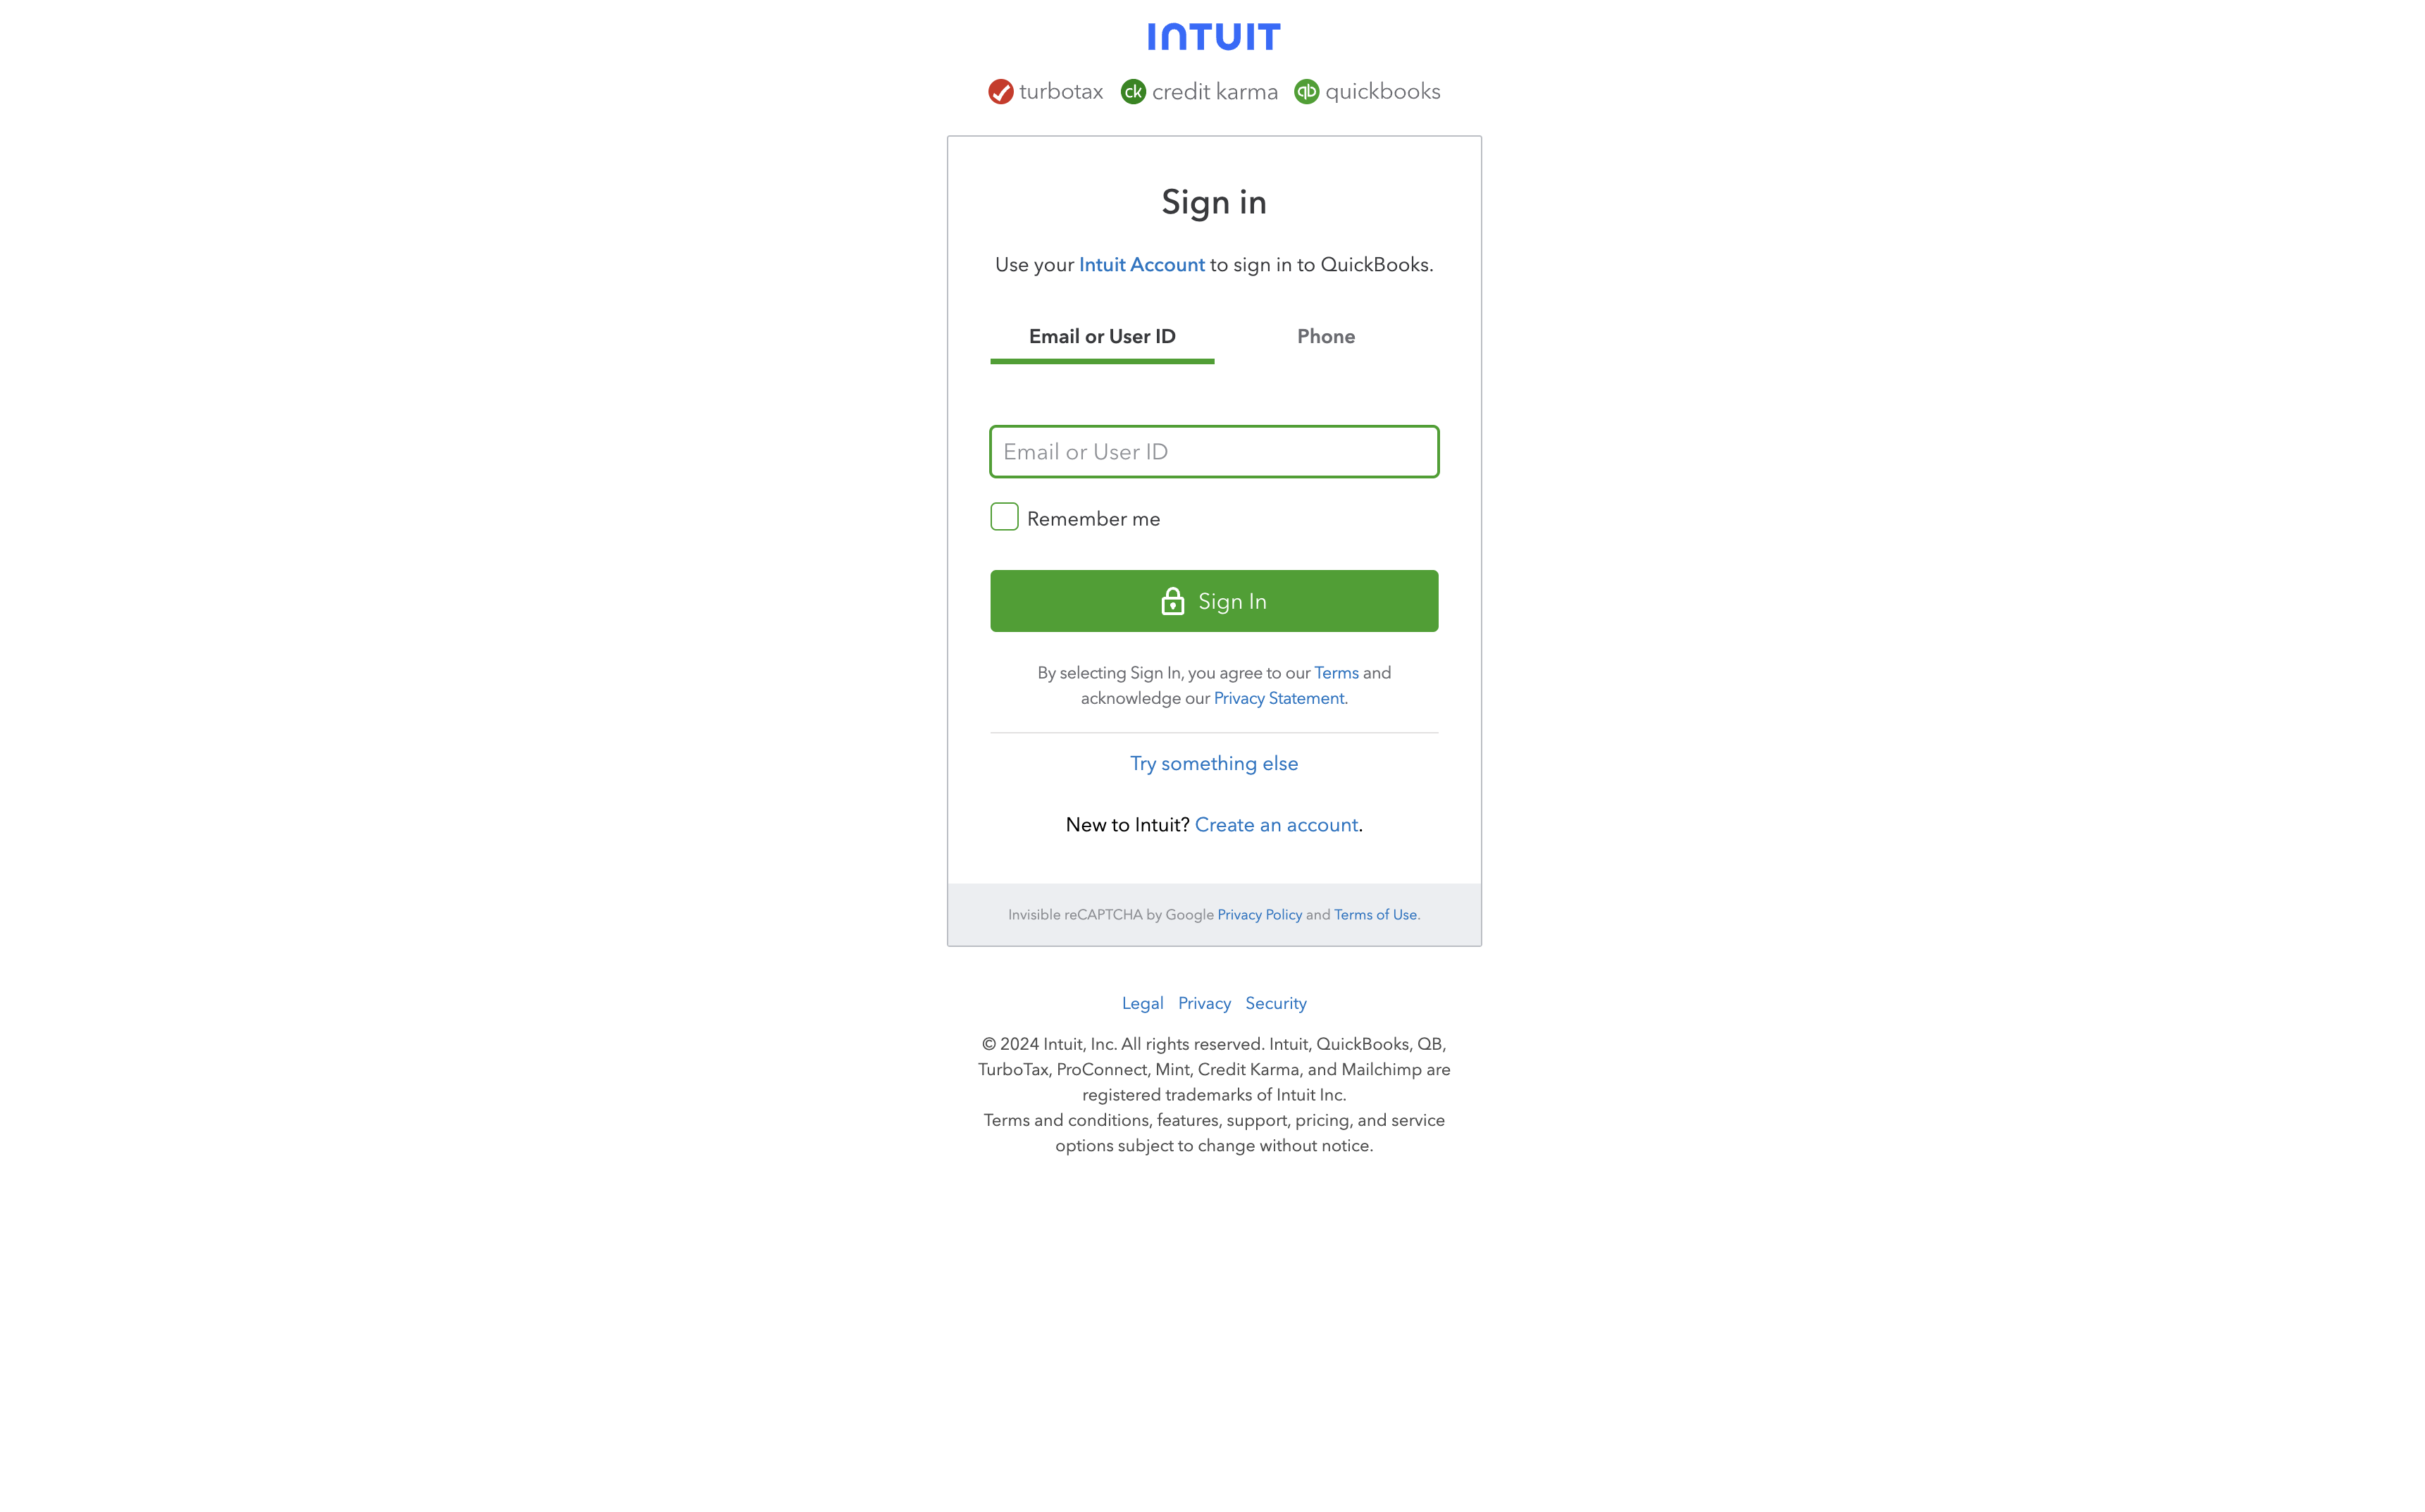
+Add connectionbutton - You will be redirected to Quickbooks login page
- Enter your Quickbooks credentials and log in to your Quickbooks account
- Click on
Acceptto grant Togai access to your Quickbooks account - You will be redirected back to Togai and the connection will be added to your account
Flows
1. Sync Togai accounts to Quickbooks
- A new account is created in Togai
- Togai then creates a corresponding customer in Quickbooks and syncs the customer identifier between Togai and Quickbooks.
- You can see this mapping of customer identifier in the Settings tab of every customer. The setting name for Quickbooks customer identifier in Togai is
QuickbooksCustomerId.
2. Sync Togai invoices to Quickbooks
- A new invoice is created in Togai
- Togai then creates a corresponding invoice on Quickbooks using the setting
QuickbooksCustomerIdfor the customer on Quickbooks. - Caution: If the customer does not have a Quickbooks customer identifier, the invoice will not be synced to Quickbooks. You can see the Quickbooks customer identifier in the Settings tab of every customer. The setting name for Quickbooks customer identifier in Togai is
QuickbooksCustomerId.