

Installation of App Instances
- Navigate to the Integrations section from the left navigation bar in Togai
- Click on
Appsto access the list of apps with tight integration support - Locate and select
Netsuitefrom the available apps - Click on the
+Add connectionbutton - Provide a name for the connection and paste your
Netsuite API keyinto the appropriate field
Triggers and Actions
There are 2 Actions and 1 Triggers available for Netsuite currently. The way it works is, If
{trigger}, then do {Action}
You can pick and choose the trigger and action that you want from the lengthy list available from all the applications.
You can use these as building blocks to build your own flows.
An example flow would be: On creation of an invoice in Togai, create payment link Netsuite.

Flows and Automation
- To enable flows, access the
Flowssection within Integrations - Select the desired flow from the available options or create a new flow to meet your requirements
- To create a new flow:
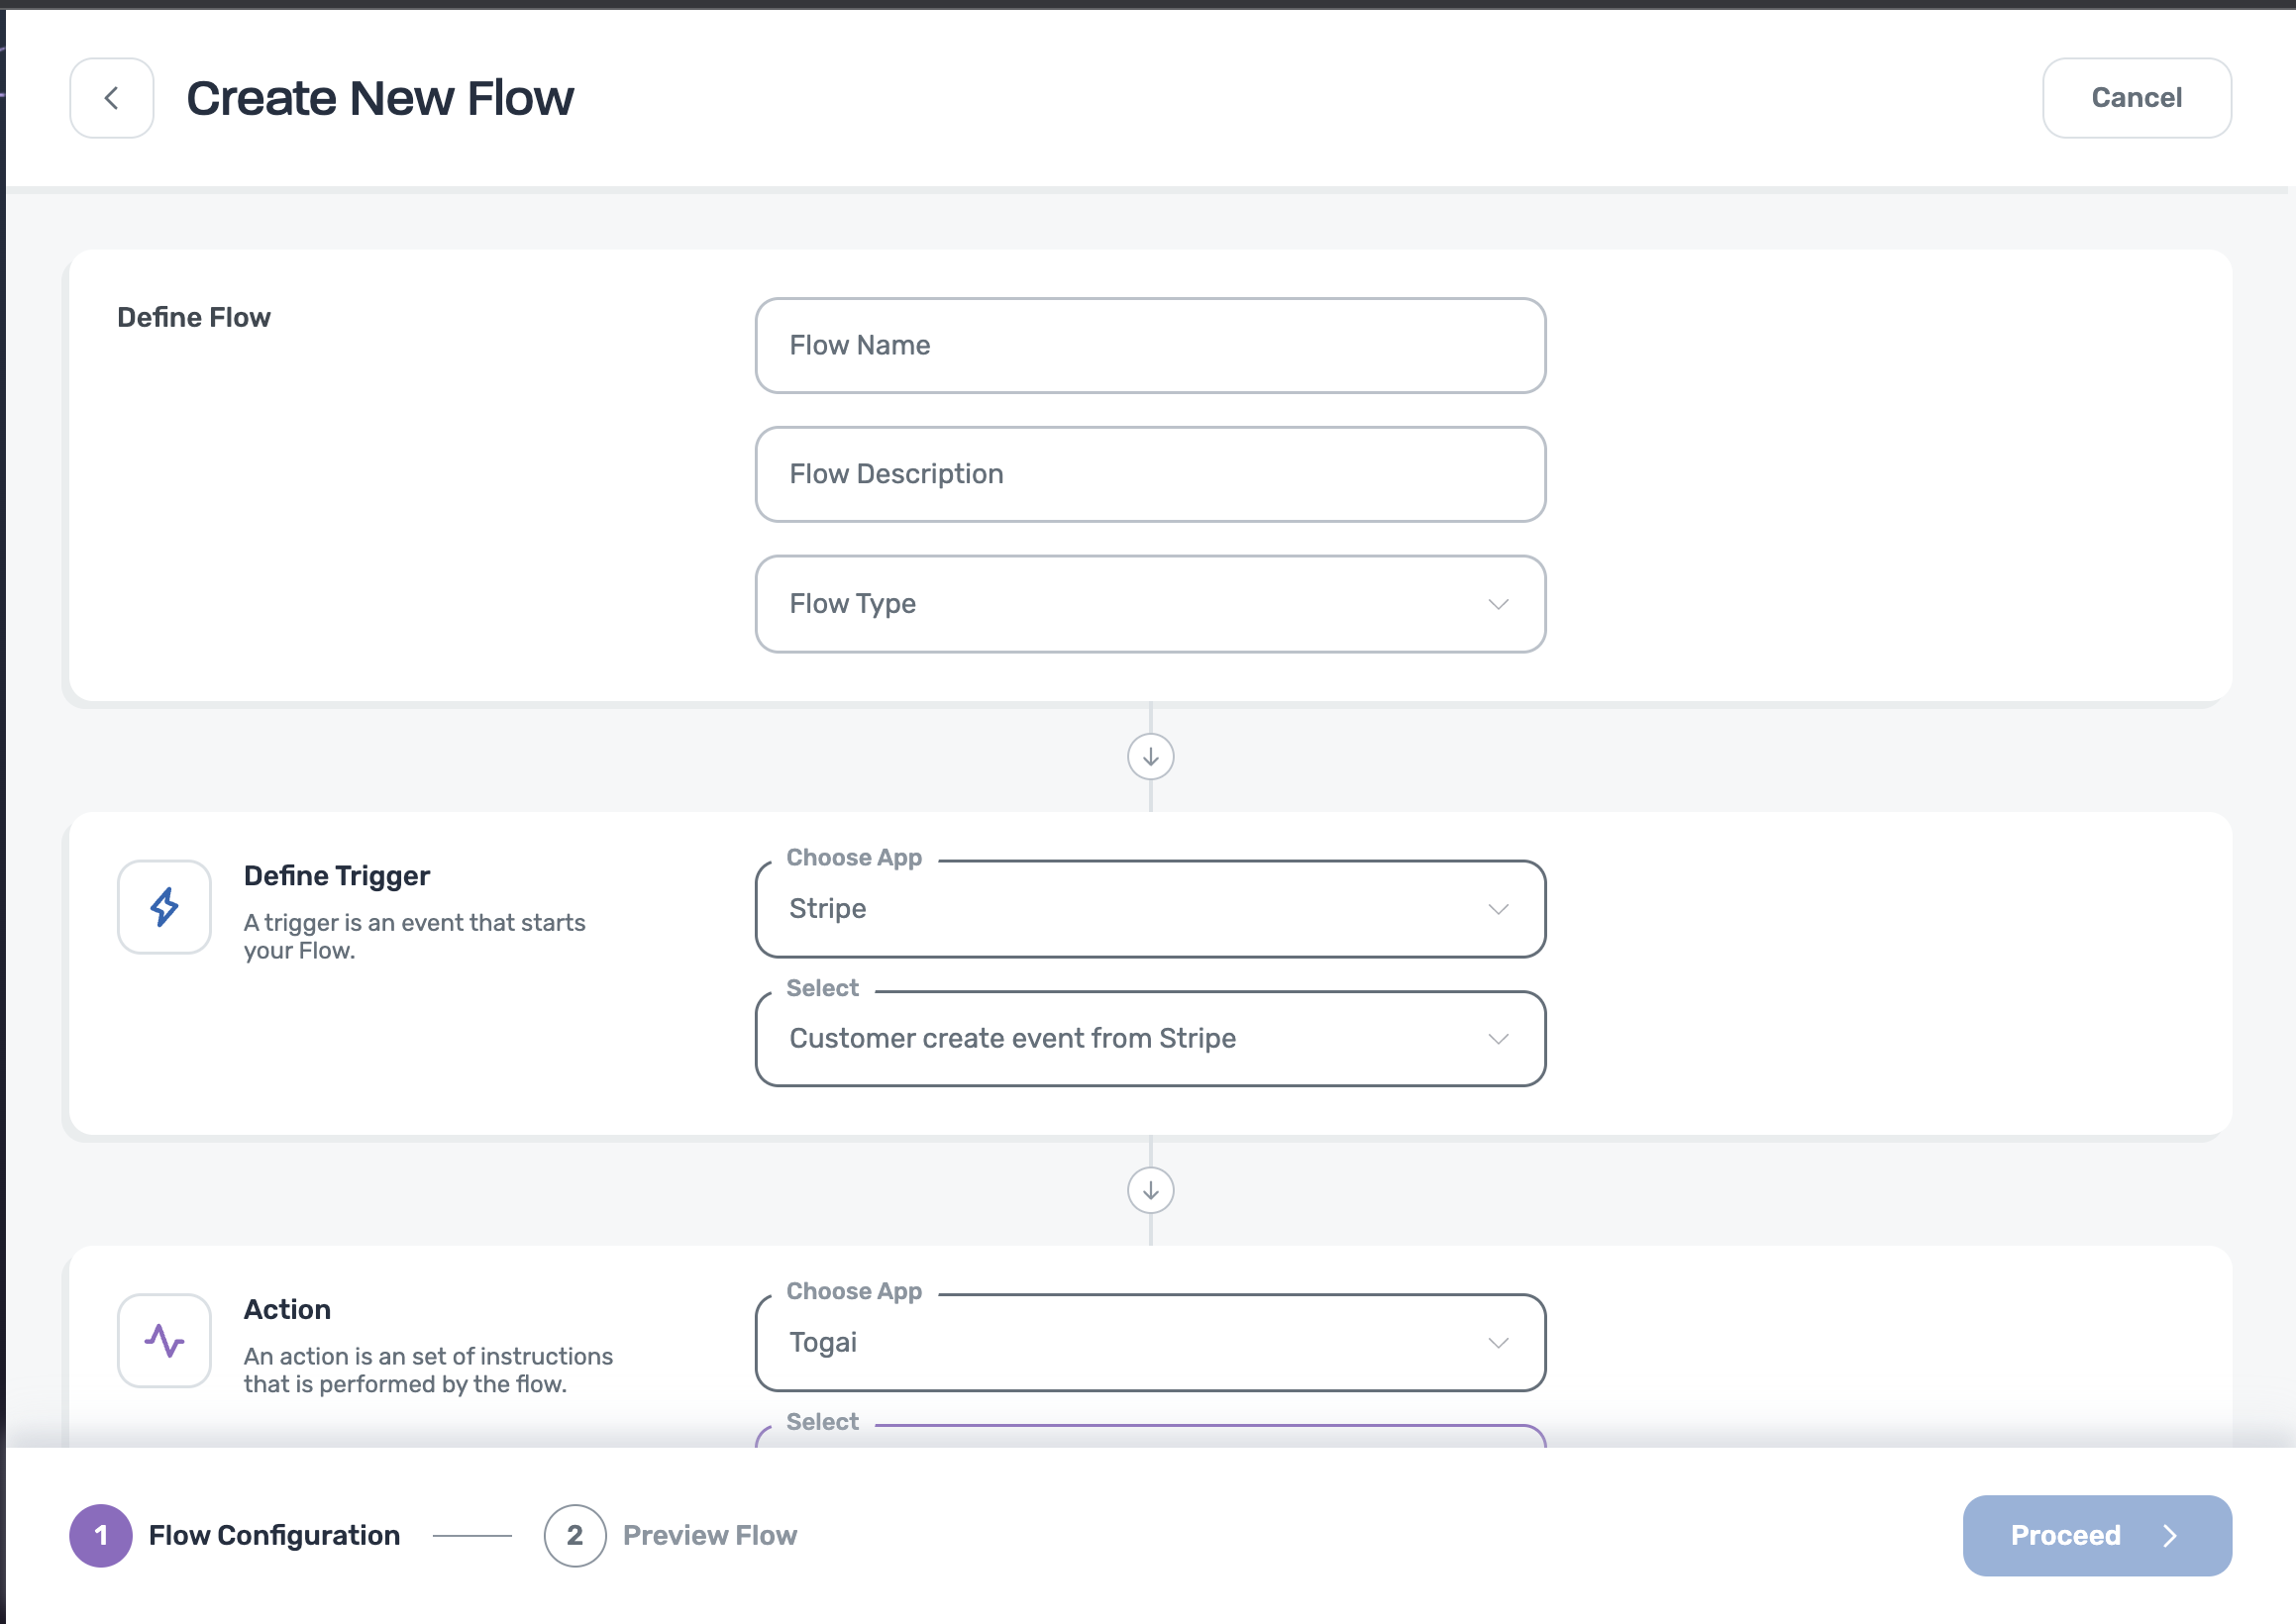
- Enter the flow name and description
- Select the flow type from the dropdown
Inbound Flow - based on third party events(eg: Netsuite), actions are triggered in Togai
Outbound Flow - based on events occurring in Togai, changes are made to the connected third party app - Define triggers by choosing the source application from where the flow starts
- Select a predefined trigger from the dropdown list
- Next, define an action which makes the desired changes by selecting the destination app
- Select a predefined action from the dropdown list. You can add multiple actions.
- Lastly, preview the flow and save changes
- Else, choose an existing flow and select
+Add Connection - Configure the triggers and actions by specifying the app instance (Netsuite or Togai) associated with each step.
Available Flows
Here are the out-of-the-box flows that you can use in the future: 1. Create Invoice in Netsuite on Togai Invoice- A new invoice is created in Togai
- Togai then creates an invoice in Netsuite for the corresponding invoice.
- You can see this mapping of invoice in the Settings for each invoice
- Once the payment is successful in Netsuite, netsuite sends a webhook call.
- On listening to the webhook call, this flow will mark the correpondng invoice as paid
Invoice ID
To refer to invoice in Netsuite or Togai, you can obtain the account ID.- In Togai, go to Customers, select an account, and find the invoice ID under Billing.
- Netsuite invoice ID is added as a setting for that invoice
- Use invoice ID to reference the invoice in Netsuite, or vice versa.